A little note, I previously used Maya for my 2D animation. In order to allow my characters to swap weapons, I would leave the plane that contained their weapon texture separate from the mesh I would generate for all the other body parts. This allowed me to swap weapons and character look independently (obviously at the cost of an extra draw call, but this was not a concern).
I am trying to achieve something similar with Spine now, and it would seem this Mix and Match approach is as close as I can get, and is the Spine supported method. I am just having trouble getting it to work.
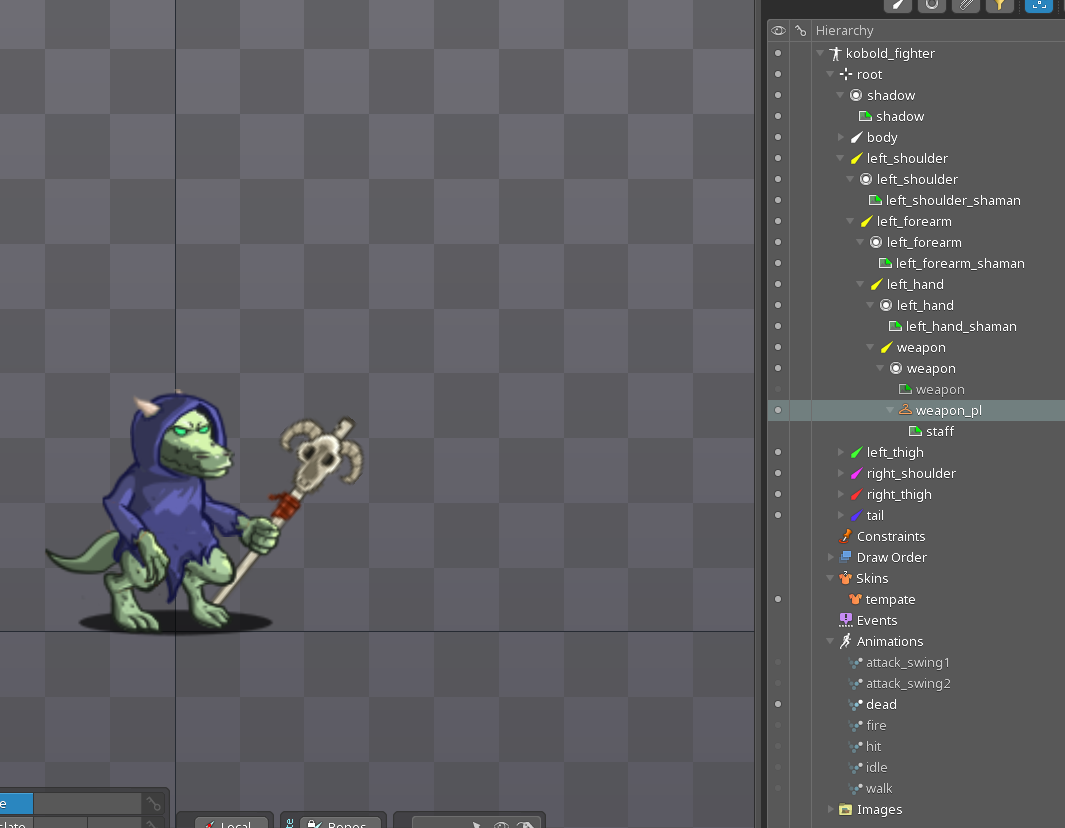
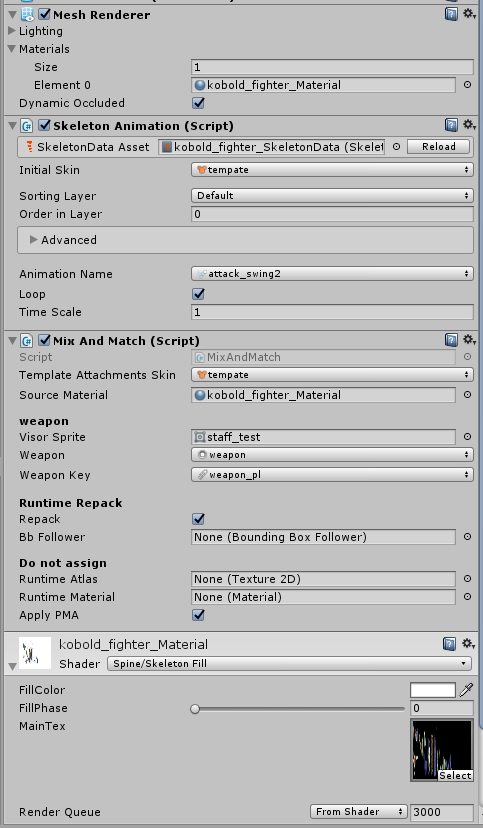
What I have done is go in to my existing Spine project, created a skin called template, and added a skin placeholder where the weapon image was previously.There was no keying done on the slot at all, only the bone it was attached to. I exported this to Unity.
I then made a new sprite asset of the weapon used by this unit, colored differently (I used the image from the spine project as a template), and imported to Unity.
Finally, I have taken the mix and match script and attempted to customize it to my needs. Then attached it to my Spine gameobject in the Unity scene.
using UnityEngine;
using Spine.Unity.Modules.AttachmentTools;
using System.Collections;
namespace Spine.Unity.Examples {
// This is an example script that shows you how to change images on your skeleton using UnityEngine.Sprites.
public class MixAndMatch : MonoBehaviour {
#region Inspector
[SpineSkin]
public string templateAttachmentsSkin = "base";
public Material sourceMaterial; // This will be used as the basis for shader and material property settings.
[Header("weapon")]
public Sprite visorSprite;
[SpineSlot] public string weapon;
[SpineAttachment(slotField: "weapon", skinField: "baseSkinName")] public string weaponKey = "weapon";
/*[Header("Gun")]
public Sprite gunSprite;
[SpineSlot] public string gunSlot;
[SpineAttachment(slotField:"gunSlot", skinField:"baseSkinName")] public string gunKey = "gun";*/
[Header("Runtime Repack")]
public bool repack = true;
public BoundingBoxFollower bbFollower;
[Header("Do not assign")]
public Texture2D runtimeAtlas;
public Material runtimeMaterial;
#endregion
public bool applyPMA = true;
Skin customSkin;
void OnValidate () {
if (sourceMaterial == null) {
var skeletonAnimation = GetComponent<SkeletonAnimation>();
if (skeletonAnimation != null)
sourceMaterial = skeletonAnimation.SkeletonDataAsset.atlasAssets[0].materials[0];
}
}
IEnumerator Start () {
yield return new WaitForSeconds(1f); // Delay for one second before applying. For testing.
Apply();
}
void Apply () {
Debug.Log("ran mandm");
var skeletonAnimation = GetComponent<SkeletonAnimation>();
var skeleton = skeletonAnimation.Skeleton;
// STEP 0: PREPARE SKINS
// Let's prepare a new skin to be our custom skin with equips/customizations. We get a clone so our original skins are unaffected.
customSkin = customSkin ?? new Skin("custom skin"); // This requires that all customizations are done with skin placeholders defined in Spine.
//customSkin = customSkin ?? skeleton.UnshareSkin(true, false, skeletonAnimation.AnimationState); // use this if you are not customizing on the default skin.
var templateSkin = skeleton.Data.FindSkin(templateAttachmentsSkin);
// STEP 1: "EQUIP" ITEMS USING SPRITES
// STEP 1.1 Find the original/template attachment.
// Step 1.2 Get a clone of the original/template attachment.
// Step 1.3 Apply the Sprite image to the clone.
// Step 1.4 Add the remapped clone to the new custom skin.
// Let's do this for the visor.
int weaponSlotIndex = skeleton.FindSlotIndex(weapon); // You can access GetAttachment and SetAttachment via string, but caching the slotIndex is faster.
Debug.Log(weaponSlotIndex);
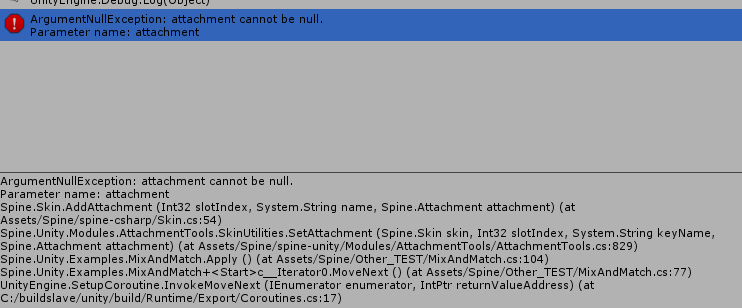
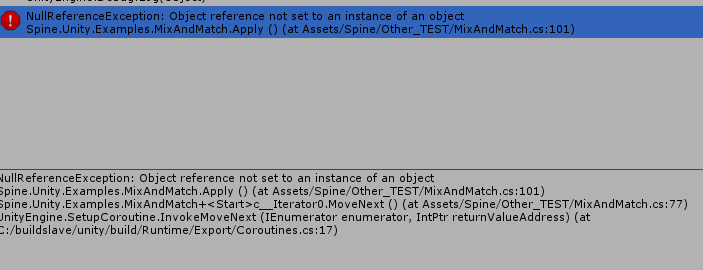
Attachment templateAttachment = templateSkin.GetAttachment(weaponSlotIndex, weapon); // STEP 1.1
Debug.Log(templateAttachment.Name);
Attachment newAttachment = templateAttachment.GetRemappedClone(visorSprite, sourceMaterial, premultiplyAlpha: this.applyPMA); // STEP 1.2 - 1.3
Debug.Log(newAttachment.Name);
customSkin.SetAttachment(weaponSlotIndex, weapon, newAttachment); // STEP 1.4
if (repack) {
var repackedSkin = new Skin("repacked skin");
repackedSkin.Append(skeleton.Data.DefaultSkin); // Include the "default" skin. (everything outside of skin placeholders)
repackedSkin.Append(customSkin); // Include your new custom skin.
repackedSkin = repackedSkin.GetRepackedSkin("repacked skin", sourceMaterial, out runtimeMaterial, out runtimeAtlas); // Pack all the items in the skin.
skeleton.SetSkin(repackedSkin); // Assign the repacked skin to your Skeleton.
if (bbFollower != null) bbFollower.Initialize(true);
} else {
skeleton.SetSkin(customSkin); // Just use the custom skin directly.
}
skeleton.SetSlotsToSetupPose(); // Use the pose from setup pose.
skeletonAnimation.Update(0); // Use the pose in the currently active animation.
Resources.UnloadUnusedAssets();
}
}
}
I am not a professional coder, just trying my best to get this method to replace my current workflow, and it's proving difficult. Any assistance would be greatly appreciated!